RabbetSpace Ideas & Tips
Fast! Easy! Neat!
The Problem...
Too much art for the frame...

The Solution...
Secure the art and finish off the back of the frame quickly, easily, and neatly.

The Problem...
Oil painting won't fit and shows terribly from the side...

The Solution...
Secures a stretched canvas in a shallow frame and covers the edge neatly in just minutes.

The Problem...
Needle art and spacer won't fit in that cute little frame...

The Solution...
Finish off the unsightly back of stretched needle art with a piece of matboard. Quick, easy, looks professional.

Helpful Hints
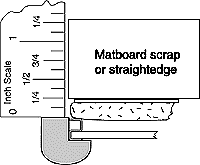
To determine which size Rabbetspace you need, fill the frame with the entire glass-art-backing package and either measure as shown at left or try small pieces of Rabbetspace.
You may have to use a deeper Rabbetspace and fill with a piece(s) of mat to get a proper fit. Remember that any pressure on the backing will likely make the art and mats buckle as they expand with changes in humidity. Rattling beats buckling.
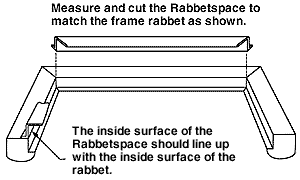
Rabbetspace can be cut on a chopper, chop saw, mitre box, and some fillet cutters. Xacto® makes a small hobby mitre box including a fine tooth saw for about $15 that works great.
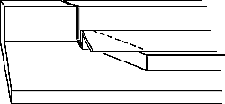
Support the Rabbetspace in the mitering device with a mitered strip of wood the same thickness as the offset in the Rabbetspace. (These wood strips are available from Frame Tek)

Position the wood strip back just a little so you don't cut it each time. Sticking the wood strip down to the base of your saw with ATG tape will help a lot.
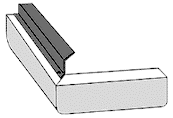
In the empty frame, drill one 1/16" pilot hole 1/4" deep and 3/32" clearance hole through just the plastic near the corner and attach the Rabbetspace temporarily with a screw at the corner. (A clearance hole is necessary to prevent buckling from expansion.) A special drill is available from Frame Tek that drills both holes at the same time. Now drill all the rest of the holes for that side. Make sure that the inside of the Rabbetspace is flush with the inside of the frame when you drill each hole.
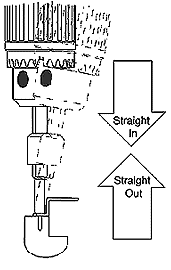
CAUTION! Drill Tip will break if you bend it!
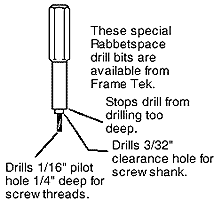
How many screws do you need? There are enough screws provided with each bundle or assortment kit to put a screw every 3". This is more than adequate. The only forces these screws must resist is the weight of all the glass, art, & backing when the frame is picked up, face up, by just the frame. Normally, the majority of the weight (the glass) is supported by the frame. If the backing or art is extremely heavy, use another method.
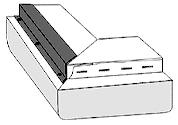
After each side has been drilled, remove the Rabbetspace and all the drilling dust, fill the frame, attach the Rabbetspace. Leave each screw slightly loose to prevent buckling due to changes in temperature.
